UPM employer portal
Work Feed guide
The guides and FAQs on this page are designed to help you resolve UPM employer portal data queries.
Scroll Down
Guidance notes
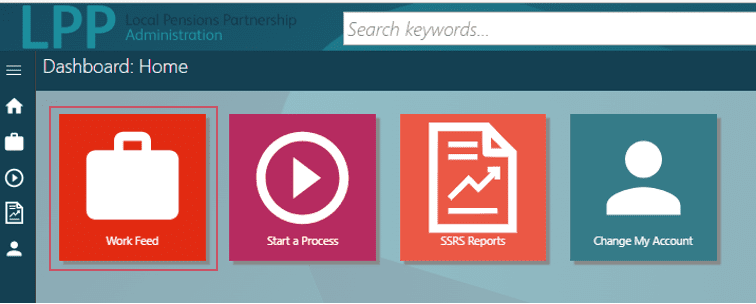
Step 1: Log in to the UPM employer portal and select Work Feed:
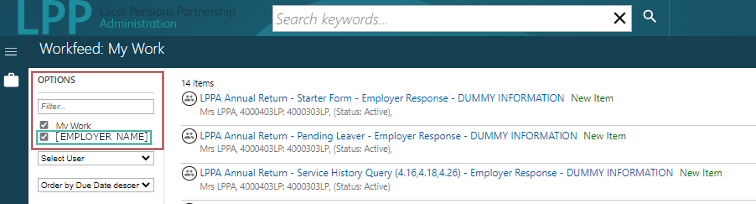
Step 2: Tick the name of your employer under OPTIONS. This will then display your queries:
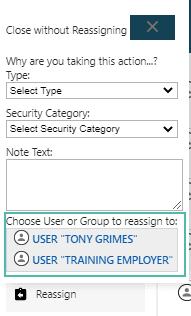
Step 3: To access the query, you must reassign this to yourself by ticking the query on the far right-hand side and selecting Reassign from the ACTIONS section.

Step 4: Select an appropriate user from the list.
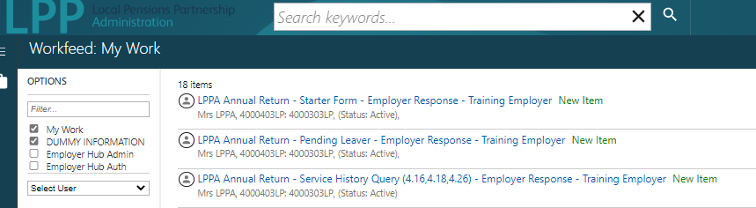
Step 5: Once the query is reassigned, the user will be able to resolve it.
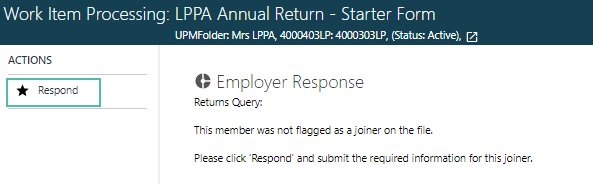
Step 1: Select a starter (joiner) form query. You will then be presented with the following screen. Please select Respond under the actions:
Step 2: Fill in the required information (* mandatory field). Once you have completed it, click Submit.
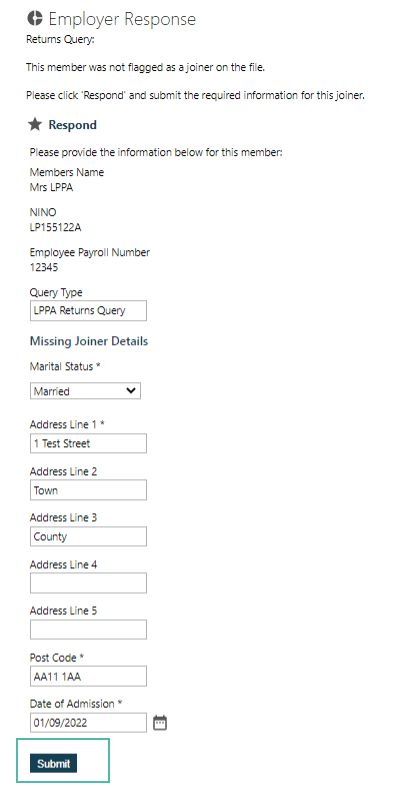
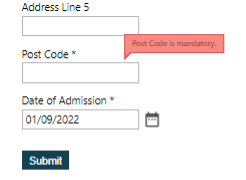
You cannot continue until you have filled in all mandatory fields!
Step 3: After clicking Submit, you will see the following screen. Click Back to LPPA.

You will then be taken back to the Work Feed. The query you have responded to will have been removed from the Work Feed.
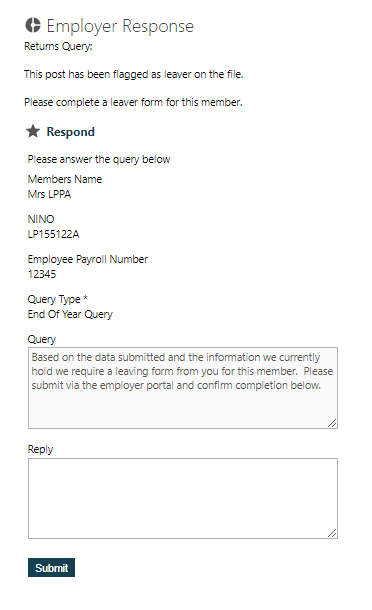
Step 1: Select a pending leaver query and you will be presented with the following screen. Please select Respond under ACTIONS:
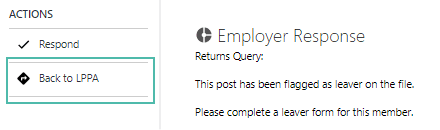
Step 2: You will then be provided with details of the chosen member and asked to submit a leaver form via the UPM employer portal:
View how to submit a leaver form (Understanding the joiner and leaver processes) here.
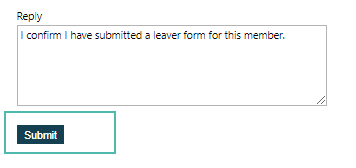
Step 3: Once you have submitted the leaver form, navigate back to the query in the work feed. Confirm this in the reply box and click Submit:
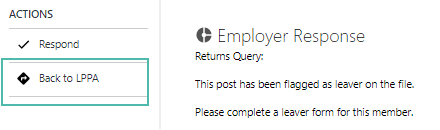
Step 4: Click Back to LPPA.
You will then be taken back to the Work Feed, and the query you have responded to will be removed.
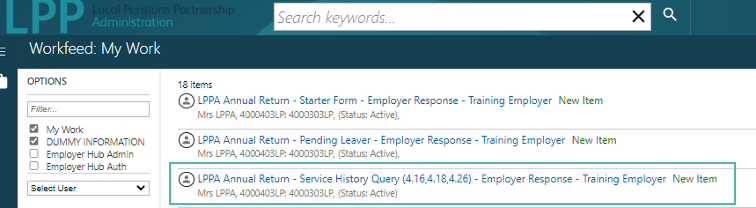
Step 1: Click on a Service History Query:
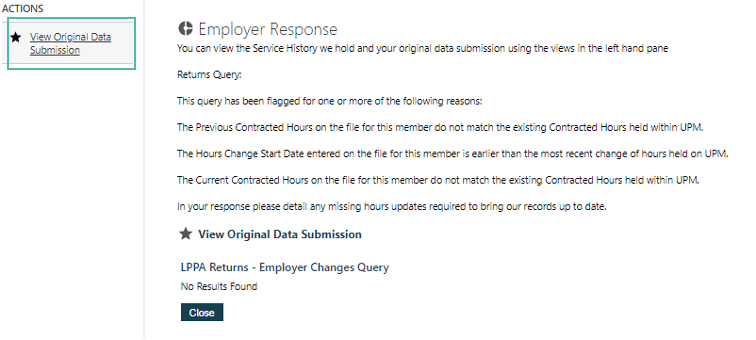
Step 2: You should see your employer response, like below. Click on View Original Data Submission.
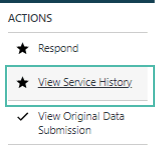
Step 3: Select Respond under ACTIONS:
Step 4: You can now view the information that was submitted on the annual return. Click on View Service History.
Step 5: Tick one of the boxes to select a row. Click View Row to display additional information:
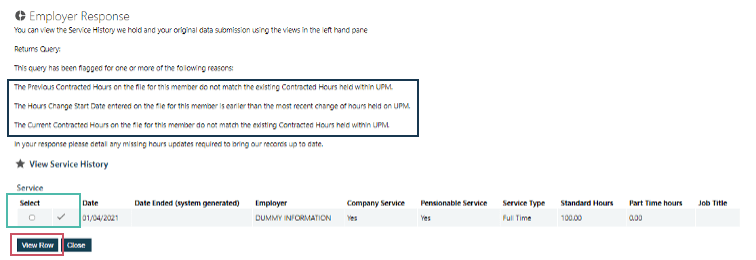
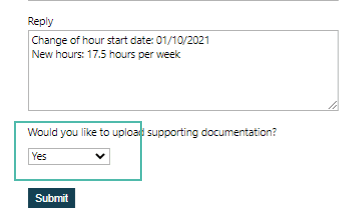
Step 6: Review the record and provide any additional or missing information in the reply box based on the highlighted criteria above.
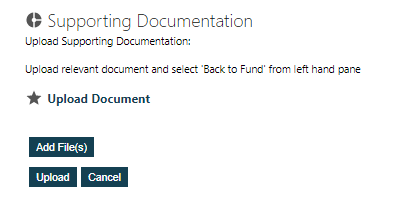
You can also attach additional supporting documentation by selecting Yes from the dropdown and follow the instructions.
Accepted file types: Excel Spreadsheet, JPEG, PDF, Word Doc & XML document
Step 7: Once you’ve clicked submit, you will then need to click Back to LPPA, and this will
Frequently asked questions
Yes, you can. We’ve added a feature to the UPM employer portal that allows you to export lists of queries, making it easier for you to identify, sort and resolve them.
You can do this by using the ‘Employer – Work Feed Queries’ tile in the SSRS Reports, and then exporting it to Excel.
Employers can currently only open and respond to queries associated with active members of the pension scheme. We are currently updating the portal to enable you to also resolve queries associated with deferred and retired members – we will inform you when this has been completed.
If you have any questions relating to the query or queries, please respond to the query with your question or query in the free text box. This will be picked up by LPPA and responded to via the work feed. This will also be the case if LPPA have any further questions following your response.
Queries for each employer can be displayed by ticking the checkbox next to the employer name in the left-hand panel and assigned to you, or a team member, using the reassign process detailed in the ‘Accessing your query’ section above. If you have access to a large amount of employers, or there are a large number of queries, we would recommend just selecting one employer at a time.
All users with access to the employer will be able to see the query whilst it is assigned to the employer. Once reassigned to a user, only the user that it is assigned to can access the query.
Yes, if a query has been reassigned to you in error, you can either reassign this back to the employer group or to another user.